HOW TO MAKE A MICRO BEAD BREAST FORM

Hi Ladies,
There has been so much positive discussion lately regarding the TLC brand Micro Bead lightweight breast forms (thanks Coonie!) that I decided to try a pair for myself about a week ago. I have been thoroughly impressed with their lightness and comfort. While the TLC forms are reasonably priced at $40 each, buying a pair with shipping is $86 and I decided I wanted to see if I could make comparable forms more cheaply. I know several other ladies have expressed interest in making their own forms so thought I would post my method with pics in case it is helpful.
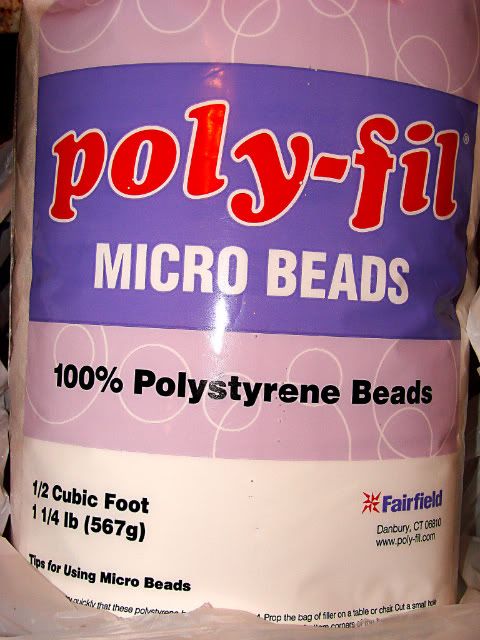
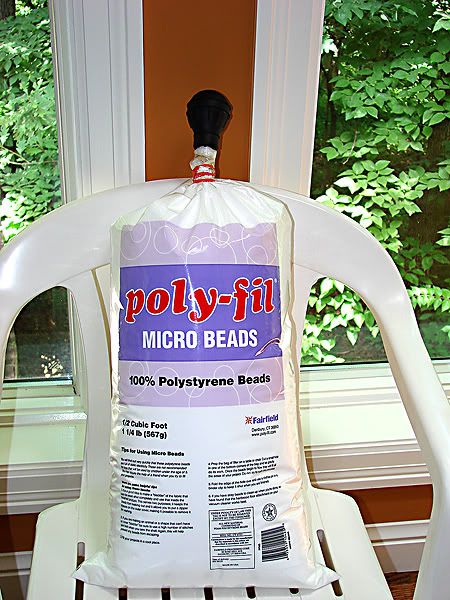
I bought a bag of the Fairfield Polystyrene Micro Beads at Jo-Anns Fabric store (thanks Lovemygarden and Sunshine99!) The bag is HUGE! And dealing with the itty bitty micro beads that fly all over the place is a challenge, but I am still meditating on that issue before trying my next form.
I bought a lightweight polyester/spandex stretchy knit fabric in white to use for the front cover on the form. I wanted to find a slightly heavier and less stretchy fabric for the back cover so it would keep its shape. The back cover on the TLC form is 100% cotton with minimal stretch only. I decided to buy a piece of lightweight soft cotton corduroy in a pretty pink pattern. I preshrank the cotton fabric when I got home since I did not want it to shrink later after the form was made.
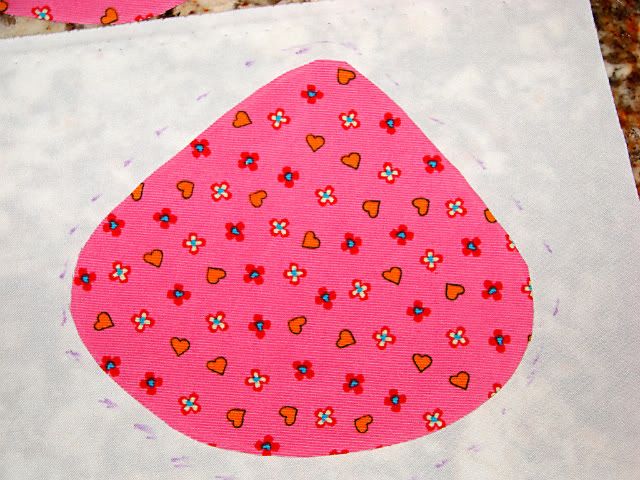
I decided to use my size 8 TLC micro bead form as a template to cutout the front and back covers for the new form. For the back cover I set the form on its back and just traced an outline around the form using a sewing marking pen. I made the tracing about 1/4 inch larger to allow for the seam to be sewn later.
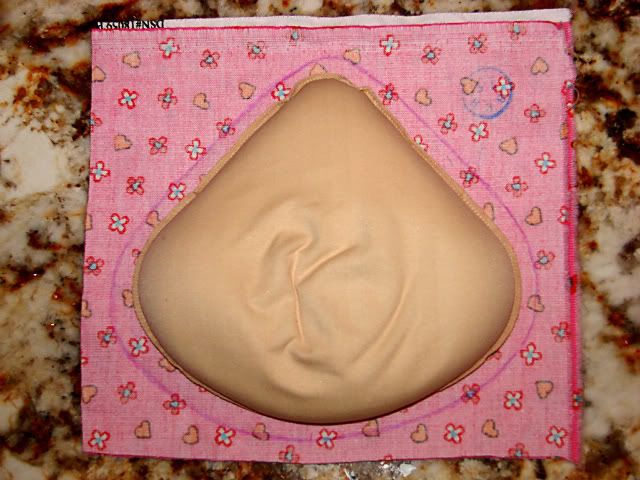
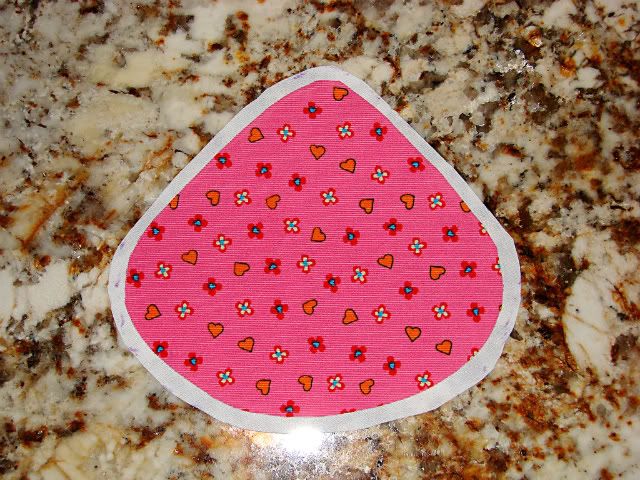
Here is the back cover fabric cutout. You can see the 1/4 inch seam allowance around the edge.
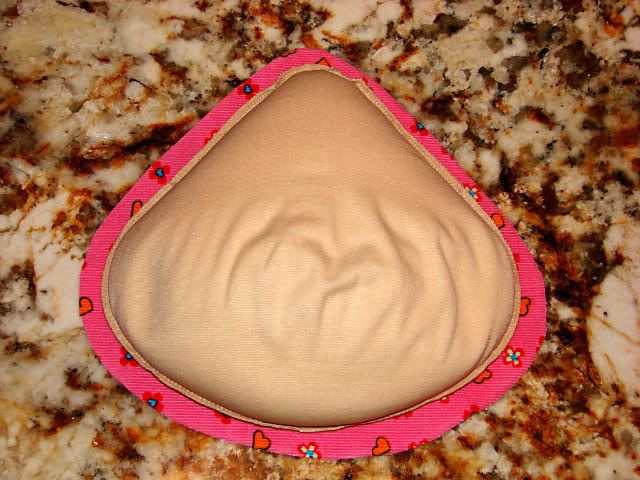
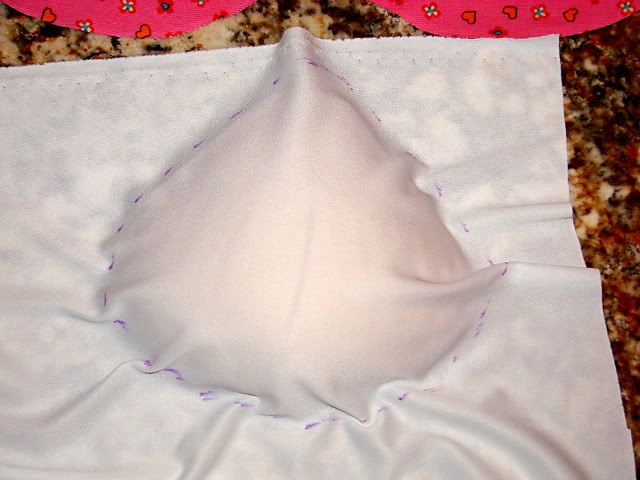
I then needed to make a pattern for the front cover. I decided to drape the front of my TLC form with the white stretchy fabric so that it would allow for the extra fabric needed to make room for the micro beads and provide some projection of the breast shape. I made a very rough outline using my marking pen around the form.
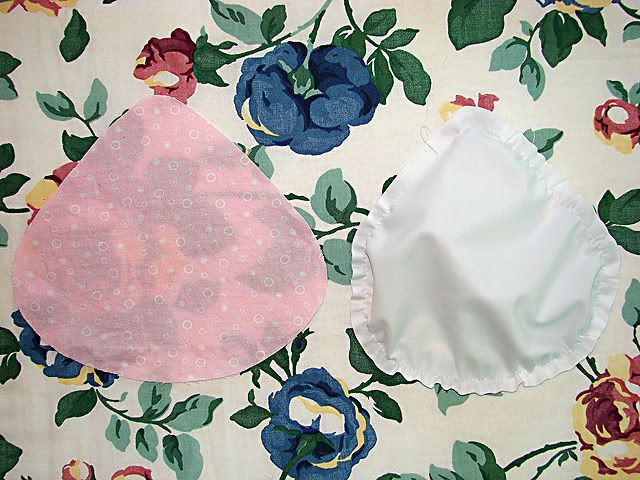
I then placed the pink back cover in the rough outline to compare sizes. I knew the white front cover would be larger than the pink back cover but wanted to make the shape uniform, so decided to add a full 1/4 inch margin around the shape of the back cover to create my front cover template. I thought this would allow enough ease in the front cover to provide movement of the beads similar to the TLC form.
I then cut out the front cover pattern in the white fabric and placed the front and back covers together for comparison. When I make another form, I may allow a little more easement allowance on the front cover.
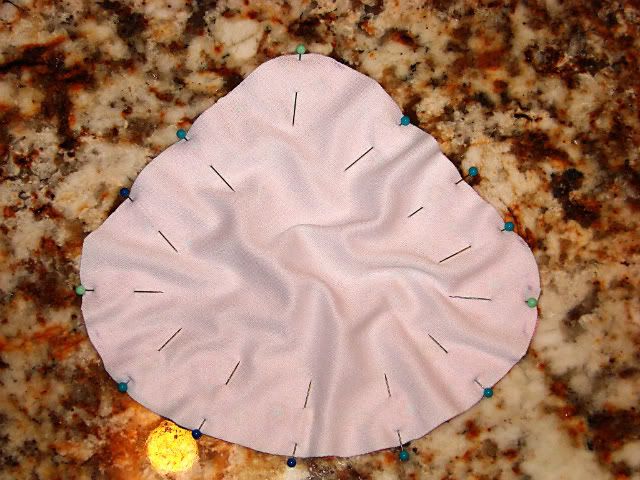
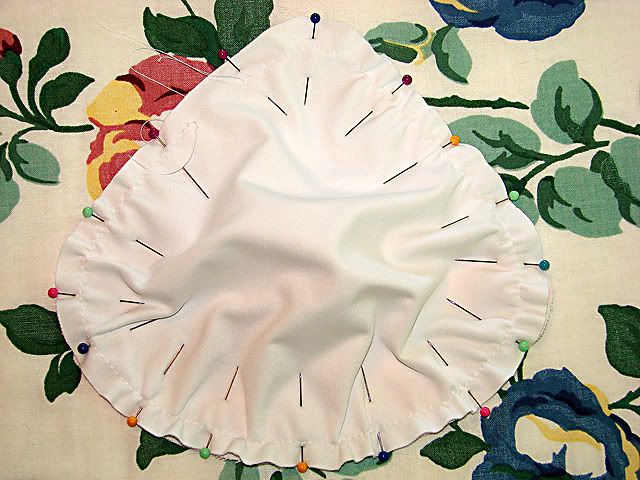
I then pinned the front and back covers together in preparation for sewing the seam. I had to work the larger front cover to the edges of the back cover and try to distribute the extra fullness evenly in the front. I used several pins to hold the covers in place.
I sewed the front and back covers together using a basic straight stitch about 1/4 inch away from the fabric edge. I had to go slowly and gently stretch the fabric to work the extra fullness in from the front cover. I also left about a 2 inch opening to use for filling the bag with the micro beads. I was curious what the weight of the covers was before adding the micro beads so I used my kitchen digital scale to check the weight. They only weighed 0.30 ounces.

I then had to figure out how to get the micro beads into the form covers without making a huge mess. I decided to work over by the trashcan, and cut an opening in the top of the micro bead bag big enough to allow a one cup measure that I could fill with the micro beads. I used the barrel of a cookie/frosting gun and placed the bottom end of the barrel inside the opening in the form covers. I held all this over the trashcan while I poured a full cup of micro beads into the barrel and into the form. The little micro beads are full of static and stick to everything. Make sure you keep a vacuum handy to clean up any spillage. You can also rinse your hands in water to get them off your hands.
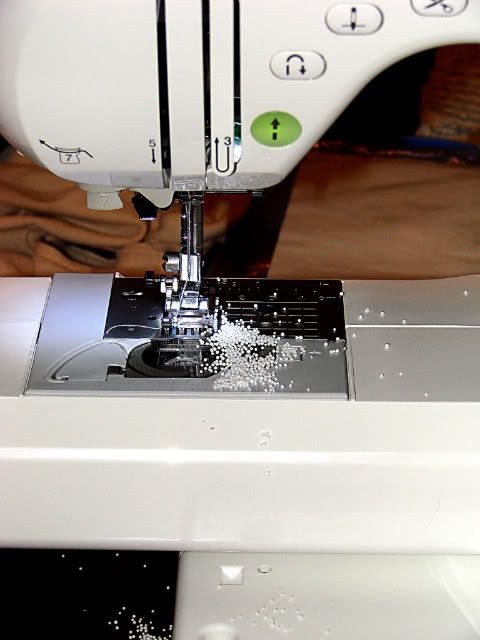
I filled the form up to the point where I felt it had enough fullness but still left some room so I could finish closing the seam with a overcast edge stitch. This is one place I goofed because I should have gone ahead and done the overcast stitching before filling the form with micro beads except for the 2 inch opening. It made it much more difficult to overcast the entire seam after the form was full of beads.Thats how I ended up with micro beads all over my sewing machine! 
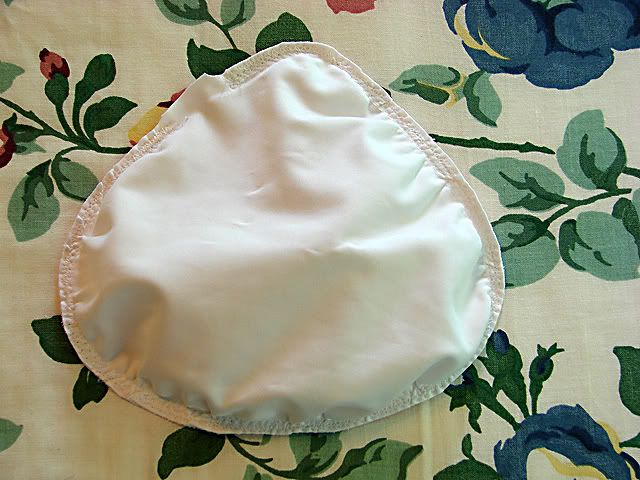
Here is what the overcast finished edge looked like on the form. Hopefully between the straight stitch and overcast stitch I won' get any bead leakage from the form.
I checked the finished form weight and it weighs the same as my TLC form at 0.85 ounces.

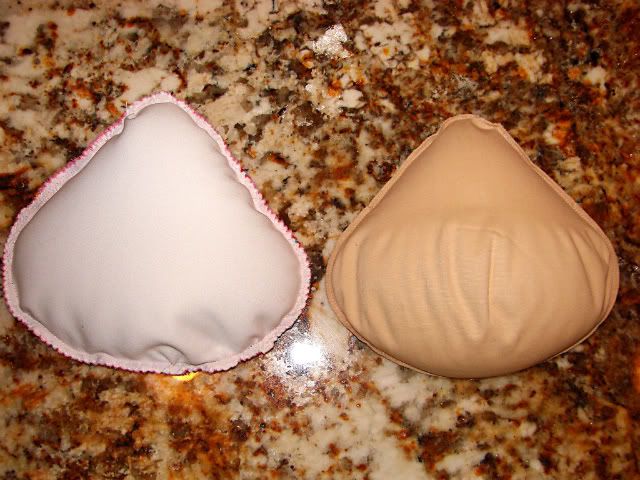
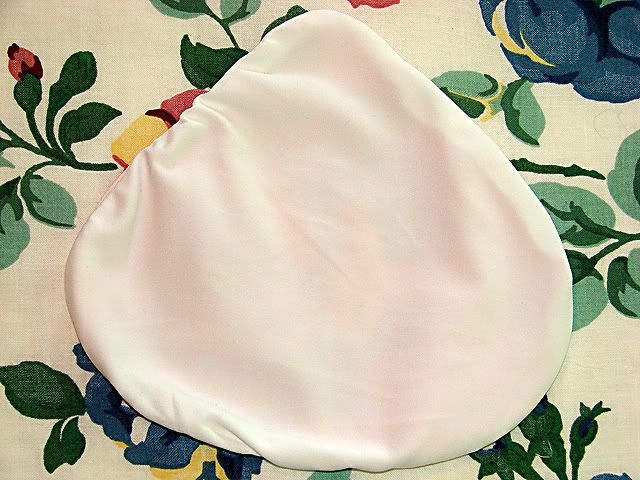
Here is the newly made form compared to the TLC form from the front side.
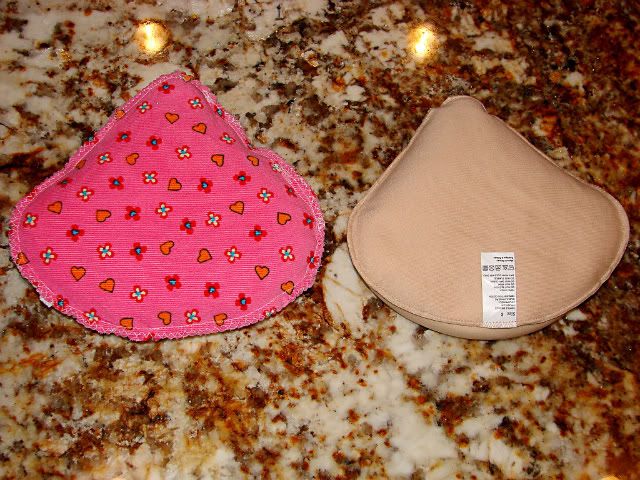
Here is a comparison of the backs of the forms.
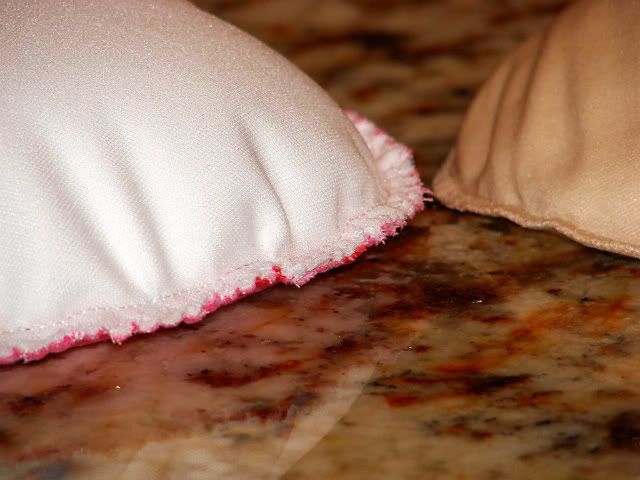
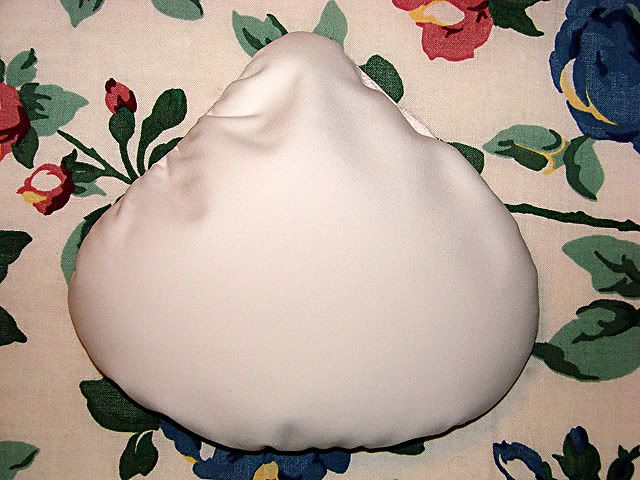
This is a shot trying to show the projection/fullness of the forms from the bottom angle.
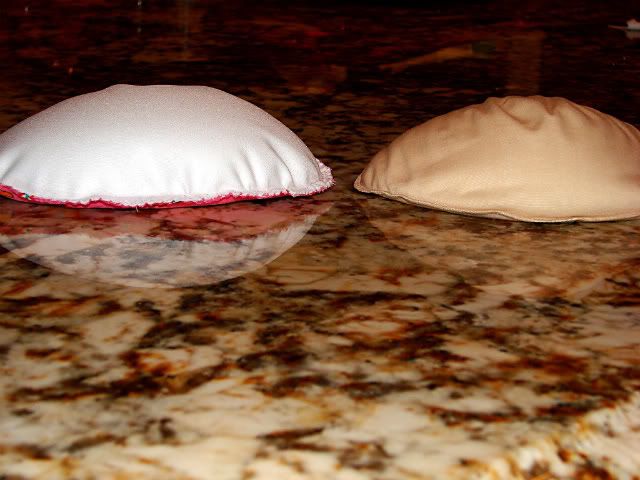
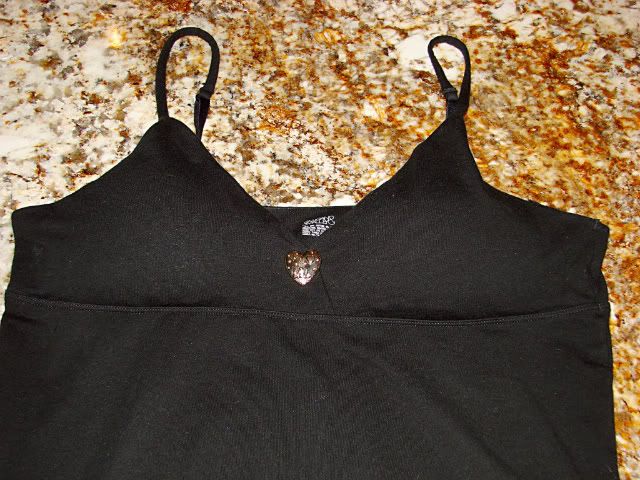
The new form is a little fuller and less squishy than the sz 8 TLC form. If I make the front cover a little larger with more easement it will probably make it more squishy but I sorta like the way the new one is now. It doesn't shift shape as much and tends to stay in the right position slightly better than the TLC one. But overall the home made form feels and looks a whole lot like the TLC one. I put both forms into one of my Target camisole tops and you really can't tell a difference in clothing. (the home made foobie is on the left side of the picture, the TLC is on the right)
I am probably going to make the other form tomorrow using the pink corduroy and then I may try making another pair of forms using different fabric and maybe changing the size a little. I want to tweak the process a little plus I have enough micro beads to make a bunch of forms! I want to finish adding some bra pockets to older tops I have so I can convert them to wearing with the forms when I choose or go flat when I want.
Hope this has been helpful. I am glad to know that making the micro bead forms is not all that difficult and certainly is a lot cheaper than buying multiple sets. 
UPDATE NOTE 6/24/10:
Thanks to everyone for all the good suggestions on how to manage the micro beads! I spent some time today brainstorming myself on that issue and also on testing the micro beads compatibility with water. This may not be a very "refined" solution but I experimented with what I had on hand!
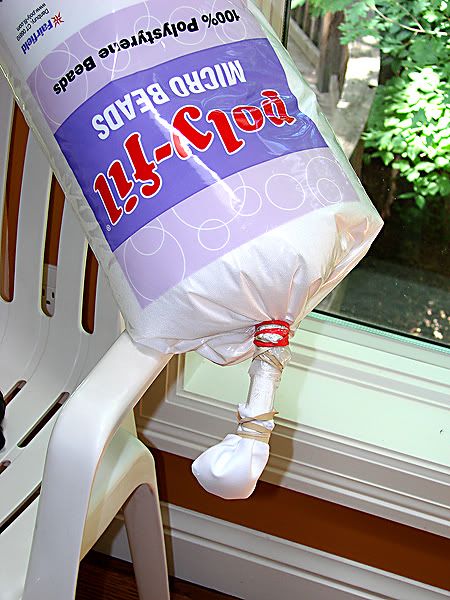
I ended up using a turkey baster to provide more controlled access to the micro beads and for easier filling of breast forms, pillows or similar type pouches.
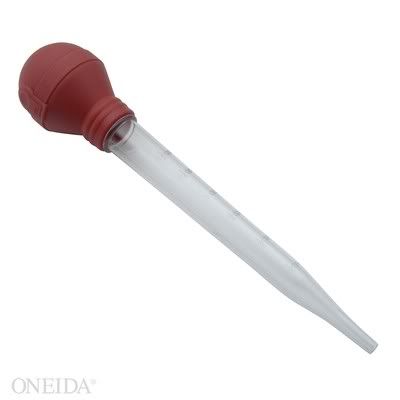
I inserted the small tip end of the baster tube into an opening in the top of the micro bead bag. I wrapped the plastic bag tightly around the baster tube and secured it with a couple strong rubber bands. I used the baster bulb head to cap the end of the tube so the bag can be stored this way.
When needing to fill a test pouch with micro beads I removed the bulb cap and attached the pouch to the tube with rubber bands while the bead bag was still upright.
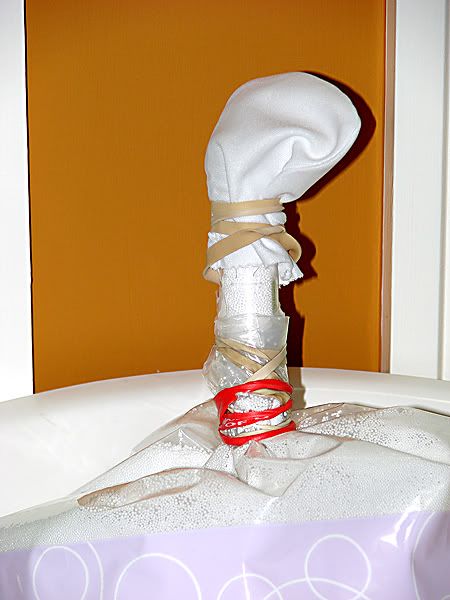
With everything secured, I then turned the bag upside down and gently pushed on the bag to help force the beads into the test pouch. A little shaking of the bag helped also.
After filling the test pouch with beads I pinched it off at the base and uprighted the bag to slowly ease the pouch off the tube. Those little micro beads still manage to float around no matter what you do, but at least this was a little more controlled spillage! I used my hand vac to quickly pick up the rogue beads.
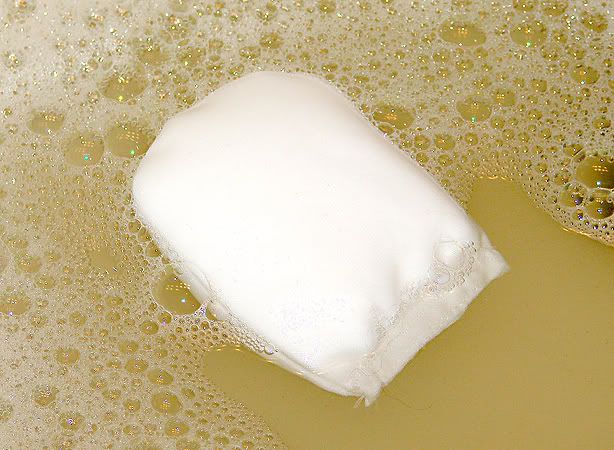
I then stitched closed the opening in the test pouch and threw it into a sink of sudsy water that I had just soaked my compression garments in. I'm gonna tell you ladies that if you wear breast forms made with micro beads when you swim make sure the forms are very secure inside the suit breast pockets! These little puppies are like the "Unsinkable Molly Brown"! That little pouch floated on top the water even after I repeatedly pushed it down and made sure it was fully soaked!
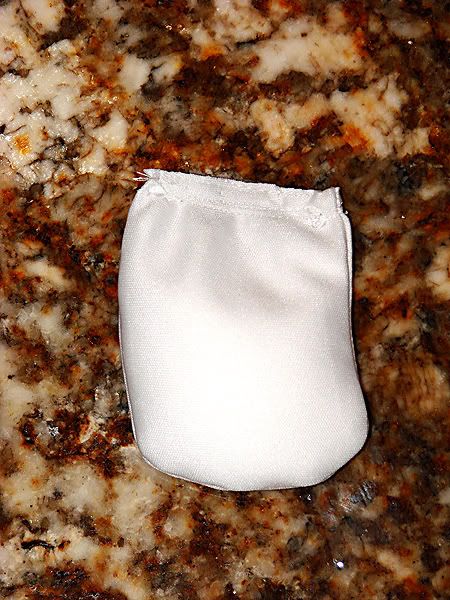
After letting the pouch float in the water for 10 mins, I squeezed it out to see what it looked like. Even when soaking wet the little micro beads did not clump together. I could still feel them rolling around in the pouch even though they were damp. I had just taken a load of laundry out of the dryer so I threw the pouch into the warm dryer and set it on air dry for 20 minutes. The pouch was still a little damp when I took it out but after another 10 minutes in front of a fan the little pouch was dry and the beads seem no worse for the wear!
So my initial assessment is that the micro bead forms should do fine in water as long as they don't slip out of their containment and float away! I also don't know whether repeated exposure to chlorinated water might break the beads down but I suppose they should last about as long as a swimsuit does anyway.
Hope this is helpful info!
Comments
-
Hi Linda,
This pictorial post is fantastic! You did such a great job, both at creating the form and documenting the process. I'm not much of a seamstress, but I feel as if I could make my own form following your instructions (and if I had a sewing machine LOL).
I bought a pair of size 2 Silique Fabu-Forms (the same as the TLC product) when Silique first introduced them. They are small in dimension, being only a size 2, but seem to be more full than your TLC forms. They don't lie flat the way yours do, so I'm wondering whether Silique has refined the forms to make them less full. I would rather mine were a little less full.
[In a totally non-bc-related question, these are wonderful photos and I'm wondering what kind of camera you use. My DH wanted to give me a camera for my birthday several months ago, and I've yet to buy one or even figure out what kind to get.]
Barbara
0 -
Hi Linda,
What a fabulous job! I had my implant removed and the prosthetic I had to go with sucks! This looks like a great option for me and I love the idea of using some fun fabrics on the back! Thanks again.
Margaret
0 -
My mom hates her prost and I know she has some of these beads (she fixed a beanbag chair for a friend). I may try making her one to see if she likes it.
Sheila
0 -
These look great!! Any thoughts on washability? I'm considering attempting some of these, but think I need to be able to wash them as I would use these for work and I have a pretty physical job...
Thanks!
Amy
0 -
Ohhhhh Linda!!!!!!!!!!!!!!!!!!!!!!
PERFECT PERFECT PERFECT!!!
Thank you SO much for doing this. It is MUCH cheaper doing it your way and with the exact same product. I'm just loving my beanie forms. Won't go back to anything else now.
Amy, I've hand-washed mine several times and just let them air dry. It works perfect. I usually just put a little liquid washing detergent in my sink of warm water, let soak a while, scrub a little, then wring them out and let air dry.
Linda--thank you for doing this. I'm not sure if I ever mentioned it, but I appreciated your pictures of flat vs forms previously. Way to go!!!!!!!
0 -
Amy I will have to test the washing with the new breast form. I know my TLC forms say hand wash only and cool air dry only....no dryer, no bleach etc. The only thing I am not sure of is if the micro beads in the TLC forms are polyurethane vs polystyrene. I believe some of the Silique advertising states "polyurethane" and I don't know if that is better suited to water than the polystyrene. I do have a couple neck pillows that are filled with the polystyrene micro beads and they state "spot clean" only so that implies don't immerse them in water. I am hoping to be able to wear forms in my swimsuits so guess I will find out sooner or later if they hold up to the chlorinated water or not. I will report back the first time I hand wash the new foobies!
Barbara my camera is a Sony DSC-H5 digital point and shoot that is at least 5 years old. I have been doing amateur photography for 30 years. Before the digital age I was shooting slide film in 35mm SLR cameras but now digital is the only way to go. I do use Photoshop CS4 to tweak the exposure, sharpness and image size. One day I may buy a digital SLR but the quality of the higher end point and shoots is really excellent nowdays. Makes it hard to justify spending the dollars for a professional SLR system if I'm not planning any commercial use for it.
Thanks Coonie! Glad you enjoyed the flat vs forms pics. I may need to do an updated version now showing the new micro bead forms in clothing. I still enjoy going flat, but these lightweight micro bead forms have me excited because I feel I now have options that I didn't have before with the heavier forms. So far wearing these feather light forms has had no negative impact on my Lymphedema so that is making me happy!
0 -
Linda,
You are so thorough and do such excellent documentation! I had been trying for several years to figure out how to do these myself, but I always got flummoxed by how big to make the front, and since I was just doing it in my head, I never got any made. I have bought two pairs of the size 2s, and I think they will be good for quite a while, but I still would like to make my own, now that I have your pics to go by! Thanks!
Barbara,
My TLC size 2s are very flat looking, until I put them on, then they make just what I've been looking for. As I have noted elsewhere, two of them in a package fit easily through the 1" mail slot in our door! I'll get some pics one of these days. My size 4 Silique Comfort-Lites had much more projection, and I had wondered about taking some of the beads out, but I was afraid I'd never get it sealed up again.
Dawn
0 -
Ah, LindaLou, what fun! I want to go to JoAnn's this minute!
Haven't seen the size of the bag of beads yet, but could you cut a small bit of the bottom corner off the bag and stick the corner into the opening in the form to fill it? (When we lived in Wyoming I used to make down-filled jackets for the kids -- now THAT was a amazing stuffing problem!
 )
)Wonderful! Thanks,
Binney0 -
Linda Lou, how flippin frustrating! I'm on dial-up (no choice) and Ive been sitting here wa-a-a-a-a-a-a-a-a-aiting for the piks to load. Some I can see in full others are chopped off and others are 1/2 loaded. The progress bar keeps on and oooon and ooooooooooooooooon ....1/2 hour later looks like ummmm the progress aint progressing. Grrrrrrr.
 I SOOO want to see these!
 Now, after that rant let me say this all looks wonderful. (from what I can see) I wonder if I can go to photobucket directly and download your piks from there or something? I would ask you also, since Im on Dial-up, if its OK if I do DL them to my pooter so I dont have this infernal waiting game everytime a girl wants to see a pik.
Anyway, thanks for sharing!
Musical
0 -
Well Ive finally loaded all the piks after I did some mucking around with the right click menu (reload pik) ...but I had to do it numerous times. Arrrghh. Ive saved it to my pooter and if you dont want me to do this just let me know and I'll delete it.
Anyway , LindaLou what a brilliant job youve done and what a great tutorial.
Musical
0 -
you are brilliant Linda.
i am busy these days, these weeks.. but really look forward to making one. I really thank you for this.
0 -
ive been avoiding my sewing machine (for alterations) till i could find a good reason to lug it out. thank you linda !! surely, this is the reason ive been looking for. my belly is so bloated from gasto/chemo problems, i need bigger foobs to hde under, for meantime..off to joanns tommorow...light and love, 3jaysmom
0 -
Binney the micro bead bag is 20 inches tall and 26 inches in circumference and weighs 1.25 lbs! When you figure it takes less than 0.6 ounces to make a foobie that's a LOT of foobies! I was afraid to put a hole in the bottom corner of the bag because I had visions of the beads all pouring out uncontrollably. Did not know how to control the flow once gravity was in effect. They need to build an attached tube into the bag that can be capped when not in use. I also wish they sold the micro beads in much smaller bags but I have not found any yet. Wow...I can't imagine hand stuffing down into all those coats! That had to be quite a job!
Musical please feel free to download the images to your computer for reference. I know how frustrating dialup and slow downloads can be. Glad you were finally able to see the pics!
I am glad you are all finding this post helpful. I am working on converting a variety of tops to hold prosthesis and am trying out several different methods for making bra pockets. Maybe I will post some of those examples later after I have them finished.
0 -
Linda its so neat when people have posted piks.... as they say.... a picture is worth 1000words
and thankyou for permission to DL. They will only be used for reference.Musical
0 -
I'm wondering if you could make them like lasagna, ... a row of lasagna with the triangle tops alternating up and down, if you wanted to make more than a few
><><><><<><><>
Have you tried wetting the beads before transferring them from the bag to the form?.. perhaps just a misting would help.
0 -
Color me impressed! You did a marvelous job with those! I'll keep my fingers crossed that the beads survived the water/pool. If you find that they don't, try looking on-line for the polyurethane beads. You could probably find some that way, and maybe even get smaller bags of them.
Maybe transferring some beads into a smaller zip-lock bag would make it easier to handle them. Also, maybe spraying some anti-static spray (can you still buy that?) into the beads would help keep them under control.
0 -
Thanks for this! I made something like that using a knit foob (my daughter is a clever knitter) and a knee high nylon reshaped to serve as the lining to keep the beads from escaping. What I didn't think of was going to the fabric store for the micro beads because I think mine are a bit heavy. Guess where I'll be going this morning!
To get the beads into the shape, I used a kitchen funnel which worked fairly well. Of course there was still a mess, but maybe less of one.
Wetting the beads separately from the project is a good idea to find out what would happen. Getting caught in a rain storm could be worrisome otherwise.
0 -
Thanks for the detailed instructions. I had a lumpectomy, so only need part of a form to "round out" my shape... And I have made a couple of embellished bras for wearing to BC events and walks. I used a 44DD padded bra, but it still needs some fill to look good. Making a couple of these forms will be the perfect fill for them.
Would wiping the bag of bead with a fabric softener sheet work to cut static? I know if you are wearing a slip that clings to panty hose and skirt, a mist of water will help with the static.
Thanks again.
0 -
Thank you, Linda Lou!!!
0 -
Ladies I just added an update note to my original post after testing my new "micro beads containment system" and also testing the beads in water. You can see the results now in the original post. 0
-
You should apply to Consumer Reports (magazine) for a job. Very thorough and detailed info. Thanks a bunch.
0 -
Excellent, Linda!
Dawn
0 -
Great Job
") Maybe we can get a sticky post for this
Maybe we can get a sticky post for this
Diagnosis: 8/30/2009, IDC, 5cm, Stage IIb, Grade 3, 3/15 nodes, ER-/PR-, HER2+0 -
Linda---you are so talented!! Thanks so much for the info. You've given me hope that I can find something that I will be comfortable with when I want "a little somethin" " there....
Coonie--Thanks so much for letting me know that hand washing has worked well for you. I appreciate it!
Amy
0 -
Thank you, Linda! Now I know what my weekend project is going to be. I couldn't figure out how to get one side of the form "poofy" and the other side flat. Your picture and description were perfect. God bless you! This could be one of the best threads on this board 0
-
Oh, I thought of another thing... I think I'm going to make a pair of forms - although my mast was only on one side, I'm still small enough that I could use a little padding on the side I still have. So, I'm thinking of making one bigger one for the mast side and a smaller one for the non-mast side.
I even thought about embroidering a little "tag" on each one: red for the right side and blue for the left. That way, it will be easier to remember which one goes where
") 0
0 -
Excellent!!! My cat actually attacked my silicon breast form (he probably thought is was a chicken cutlet) . i really didn't want to buy a new one. I am putting my old Singer to work!
0 -
I'm thinking it might be possible to make the case out of an old T shirt, which would be even more comfortable—though not as quick-drying.
0 -
what to do with leftover microbeads if you have kids
FLOAM
Instructions
Things You'll Need: 1 c. warm water, divided 1 cup craft glue (must contain polyvinyl alcohol) 2 tsp. Borax 3 c. micro beads (the type used to stuff bean bags) 2 small packets powdered instant (koolaid-type) drink mix in 2 different colors 2 quart-sized resealable (ziplock-type) plastic bags Step 1 Pour the Borax into a medium-sized bowl. Stir in about 1/3 c. of warm water, continuing to stir until the Borax dissolves completely.Step 2 Put each envelope of powdered drink mix in a small bowl, then add 1/3 c. warm water to each bowl. Stir until the drink mix is thoroughly dissolved, then add half of the glue to each bowl.Step 3 Place half of the micro beads into each bag. Pour half of the Borax mixture and one bowl of the glue mixture into each bag of beads.Step 4 "Burp" the air from each bag and seal it tightly. Squish your floam until it is well mixed. Let it stand for about half an hour, then knead it a bit more to make sure some it's good and squishy.
0 -
UPDATE 7-10-10:
I wanted to update my process for making the microbead forms at home since I have made a few pairs now. Here are just a few tips with pics if you decide to make your own.
1.) I found that trying to piece the larger top cover of the form to the smaller back cover was easier if you ran a simple basting stitch in the front cover first and then gathered it up evenly to fit the back cover.
BASTING STITCH IN TOP COVER TO GENTLY GATHER TOP TO FIT
PINNING GATHERED TOP TO BACK COVER
2.) I also found that keeping the seams on the outside of the form tended to make ridges show through the bra or top you wore them in and they just didn't look as finished as I would like. So I decided to leave a small opening (aprox 1.5 - 2.0 inches) when stitching the front and back covers together (keep right sides together) and then turned the fabric inside out so the seam was hidden inside. I folded the raw edges of the opening to the inside of the pocket and pressed them smooth. After filling the form with microbeads I then just topstitched the small opening closed using the sewing machine.
COVERS SEWN TOGETHER WITH OPENING FOR TURNING
FORM COVERS TURNED INSIDE OUT TO HIDE SEAMS AND PRIOR TO STUFFING WITH MICROBEADS
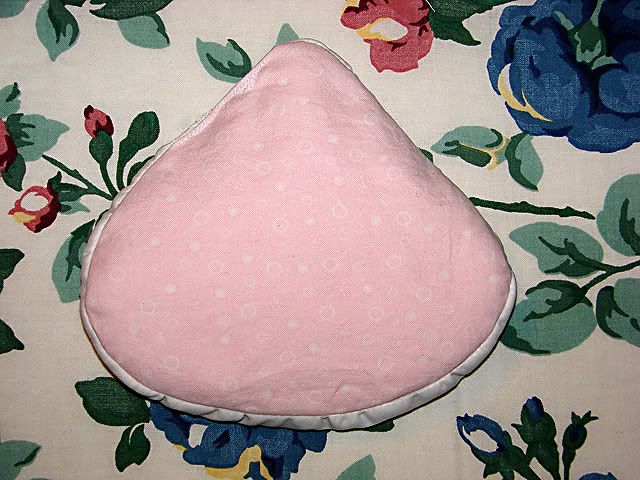
FRONT OF FINISHED FORM AFTER STUFFING WITH MICROBEADS AND STITCHING OPENING CLOSED
BACK OF FINISHED FORM
3.) Fabric selection is important also. The fabric for the back cover needs to be either non-stretch cotton or very minimal one-way stretch cotton because you need it to keep the triangle shape of the form. The material for the front cover of the form needs to be a two-way stretchy fabric with generous ease so there is room for the microbeads to fill it out with the desired projection profile in front. Both fabrics should be washable.
4.) Stuffing anything with microbeads is a pain in the %$#@! I thought I must just not be doing it the right way but I have spoken with numerous sewing store employees who say they have never found an easy way to get the microbeads into any project. I finally gave up on my turkey baster (it was too slow to fill and got clogged) and started using a cookie dough press tube which was wider at both ends. I still take the bag of microbeads out on the deck and try to fill the forms there to reduce hundreds of little microbeads floating around my sewing room. Definitely keep your vacuum handy if you use them indoors!
5.) If you plan on making several pairs of forms its a good idea to create a muslin pattern that you can label and include any markings as a reference. I have made a couple pairs for friends and make a muslin cloth template of their form size so I can make more later if needed of the same size.
BREAST FORM TEMPLATES
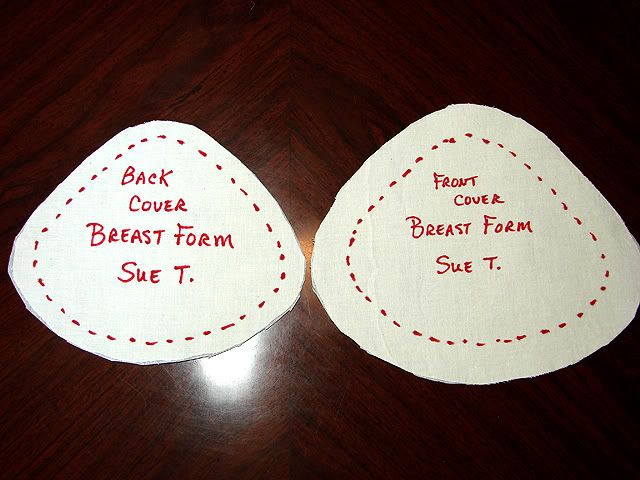
Hope this helps any of you wanting to make your own breast forms. It really is not that difficult and certainly cost effective if you would like several pairs or different sizes!
0


